


Hello! My name is Erin, from Creek Bed Threads, and I'm going to be doing a few guest posts on the STE blog here and there. This tutorial, which is also posted on my blog, is great for when you want to change up the look of your Etsy shop or blog quickly and easily.
Today I am going to show you how to make an Etsy or blogger banner for free, using the online photo editing program called picnik! Etsy banners are very simple to make, but can often be very frustrating if you're not used to using photo software. For those of you without an Etsy shop, but with a blog, it's also nice to have a banner stating your name and what you do at the top of your blog, rather than just text. This will teach you how to do that! Please note that you can click each image to enlarge it.
I'm going to use a standard Etsy banner size to do this, which is 760 pixels wide by 100 pixels tall. If you're not familiar with pixels, it's ok, you really don't need to be. It's basically just the way computers measure size, similar to inches or centimeters. A one by one pixel square is just a very very tiny dot on your computer screen.
First, let me give you the starting template. This is just a plain old rectangle, but I've colored it a very slight gray. This color will not necessarily show up in your final banner unless you want it to, but it's easier to see in picnik.
To start, click on the image below. It will open in a new window (it is necessary to open it in a new window in order to get the correct size). Then right click the image, and save it to your computer somewhere where you will remember it. Feel free to rename it however you'd like.

Now head over to picnik. You'll see this:
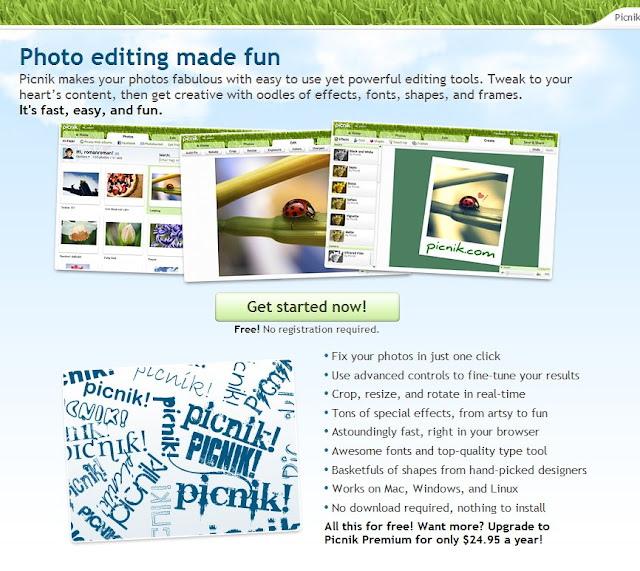
Go ahead and click on 'Get started now!' You'll then want to click 'Upload photos' and choose the image that you just saved.
Now you will see the gray box in picnik. We're ready to get going now!
Click the tab at the top that says "Create". Below that, click on "Text".
For now, we're going to leave the gray box - we can change it later. Instead, we're going to go ahead and add some text, like your blog or shop name, and a tag line. To do this, click on the "text" button. In the box, type your blog/shop name, I'll use Creek Bed Threads. Click "Add". Now you can change the color to whatever you'd like. Remember, we'll change the background color in a minute. Look for the "text properties" box and click whichever color you'd like. To change the font, click any font on the left side menu. Make sure you don't choose a "Premium" font, though, you have to pay for these! There are a lot of great free fonts available.
You can also resize your text by dragging the corners of the text box. To add additional text, just head back to the box in the top left, type your additional text, and click "Add".
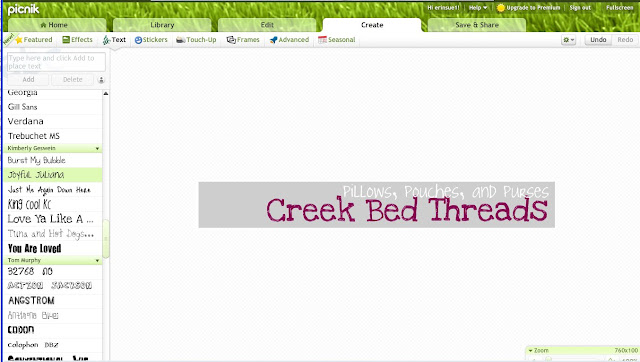
Now we're going to add some color behind the text. Click on the "Stickers" link, which is right next to the "Text" link you clicked earlier.
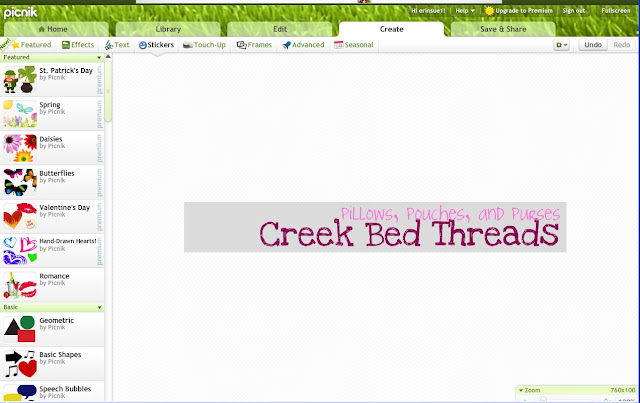
Look along the left hand side of your screen. You'll see many different options. The first thing we want to do is change the background color. To do this, we're just going to add a solid colored rectangle. Scroll down until you see "Geometric" and click on it. Click on your image and drag it to create a new box. Use the sizing handles to make it about the same size, or a little larger, than the original gray box. Now you can adjust the color of the rectangle by choosing a color in the "sticker properties" box. Just click anywhere on the colors shown to choose the color you want. I've shown this one in pink.

But what happened to our text???? With the rectangle selected, right click and click "send to back". This will put it behind your text!
Now is the time you may want to play with placement, colors, etc. Each time you click on an object (your rectangle, text, etc.) you will see a properties box. This is where you can change the color, font, etc.
If you'd like a border around your image, add another rectangle in the same manner as before, but size it slightly smaller than your image. This will create a "border". Again, it will hide your text at first, but right click and click "send backward" ("send to back" will push it too far back). Repeat the right click - "send backward" until you can see all of your text.
Ok, now it's time to make it pretty. Make sure you're still on the "Stickers" menu. Now you can scroll around and check out all of the fun images and icons they have for you to use. There are many options! Beware for the "premium only" icons, though, you can't get these for free. Keep scrolling down and there will be more free options!
Here is what I chose to do. Notice that I changed my background rectangle to pink, and added another white rectangle on top - but this time I used the option with the rounded corners rather than the square corners. I also added some squiggly leaf things - these are actually two stickers that I arranged to touch, making it look like one. You can easily flip, rotate, and otherwise edit the stickers from the properties window that shows up when you click the object. Remember, to change the layering of any object, right click on it, and click "send backward" or "bring forward". If you want to send it all the way to the back or front of your objects, click "send to back" or "bring to front".
Here is another option I played around with, just keeping the gray background.
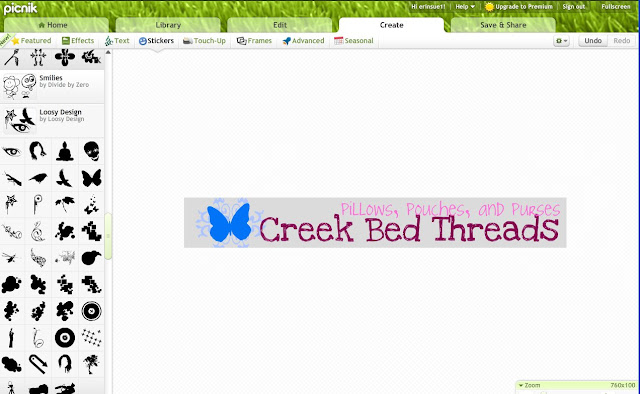
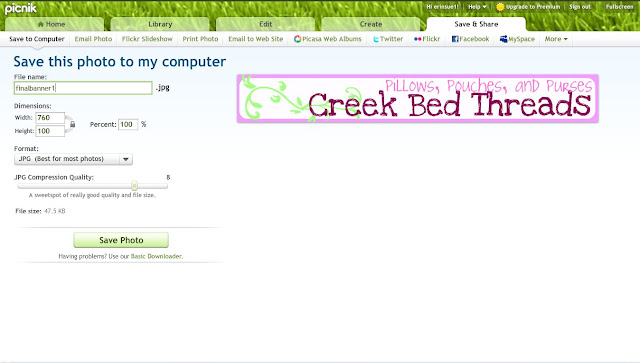
Once you're satisfied, click the "save and share" tab. It should realize that you want to save it at 760x100 pixels, but just check to make sure. Then click "save photo"! That's it! Now it's ready to be added to your shop or blog.

I would LOVE to see your creations if you try this! Please leave links! And if you have questions or need clarification on anything, just ask below and I'll try to respond below as well.

Today I am going to show you how to make an Etsy or blogger banner for free, using the online photo editing program called picnik! Etsy banners are very simple to make, but can often be very frustrating if you're not used to using photo software. For those of you without an Etsy shop, but with a blog, it's also nice to have a banner stating your name and what you do at the top of your blog, rather than just text. This will teach you how to do that! Please note that you can click each image to enlarge it.
I'm going to use a standard Etsy banner size to do this, which is 760 pixels wide by 100 pixels tall. If you're not familiar with pixels, it's ok, you really don't need to be. It's basically just the way computers measure size, similar to inches or centimeters. A one by one pixel square is just a very very tiny dot on your computer screen.
First, let me give you the starting template. This is just a plain old rectangle, but I've colored it a very slight gray. This color will not necessarily show up in your final banner unless you want it to, but it's easier to see in picnik.
To start, click on the image below. It will open in a new window (it is necessary to open it in a new window in order to get the correct size). Then right click the image, and save it to your computer somewhere where you will remember it. Feel free to rename it however you'd like.

Now head over to picnik. You'll see this:

Go ahead and click on 'Get started now!' You'll then want to click 'Upload photos' and choose the image that you just saved.
Now you will see the gray box in picnik. We're ready to get going now!
Click the tab at the top that says "Create". Below that, click on "Text".
For now, we're going to leave the gray box - we can change it later. Instead, we're going to go ahead and add some text, like your blog or shop name, and a tag line. To do this, click on the "text" button. In the box, type your blog/shop name, I'll use Creek Bed Threads. Click "Add". Now you can change the color to whatever you'd like. Remember, we'll change the background color in a minute. Look for the "text properties" box and click whichever color you'd like. To change the font, click any font on the left side menu. Make sure you don't choose a "Premium" font, though, you have to pay for these! There are a lot of great free fonts available.
You can also resize your text by dragging the corners of the text box. To add additional text, just head back to the box in the top left, type your additional text, and click "Add".

Now we're going to add some color behind the text. Click on the "Stickers" link, which is right next to the "Text" link you clicked earlier.
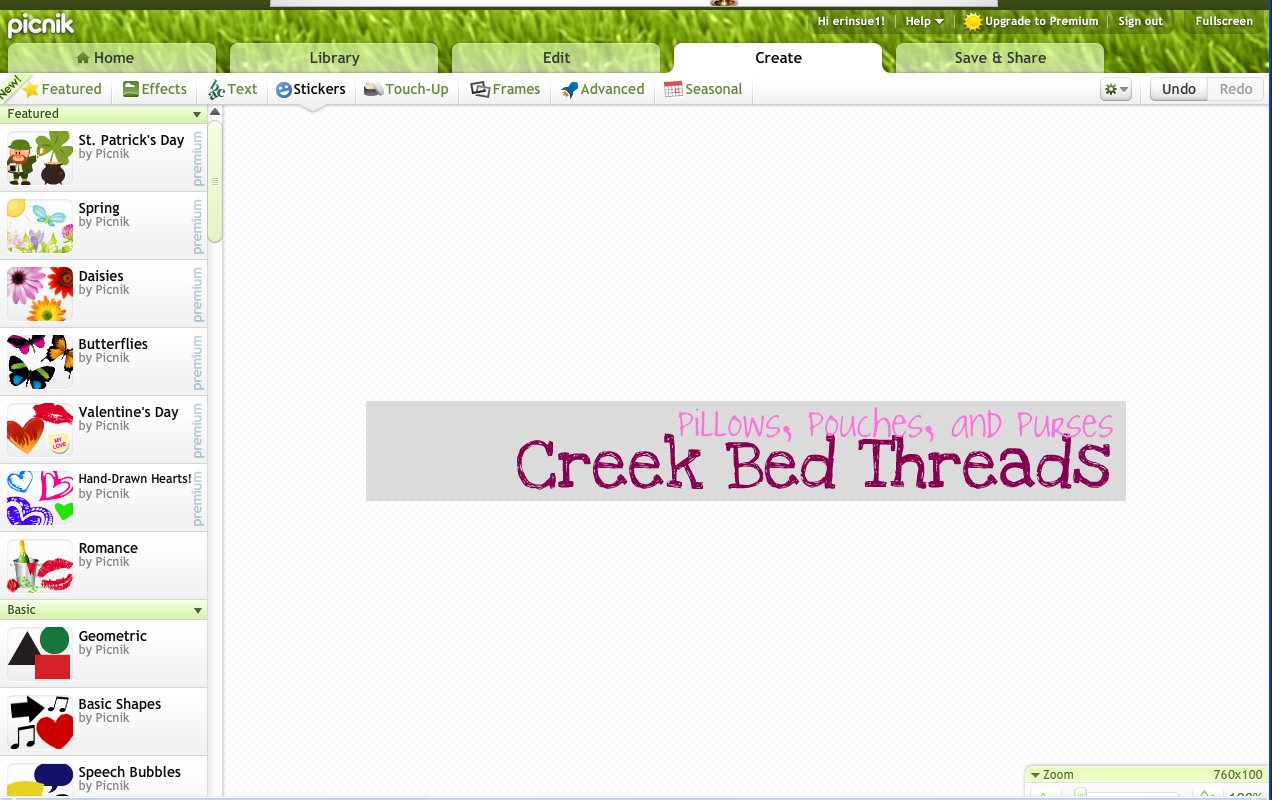
Look along the left hand side of your screen. You'll see many different options. The first thing we want to do is change the background color. To do this, we're just going to add a solid colored rectangle. Scroll down until you see "Geometric" and click on it. Click on your image and drag it to create a new box. Use the sizing handles to make it about the same size, or a little larger, than the original gray box. Now you can adjust the color of the rectangle by choosing a color in the "sticker properties" box. Just click anywhere on the colors shown to choose the color you want. I've shown this one in pink.

But what happened to our text???? With the rectangle selected, right click and click "send to back". This will put it behind your text!
Now is the time you may want to play with placement, colors, etc. Each time you click on an object (your rectangle, text, etc.) you will see a properties box. This is where you can change the color, font, etc.
If you'd like a border around your image, add another rectangle in the same manner as before, but size it slightly smaller than your image. This will create a "border". Again, it will hide your text at first, but right click and click "send backward" ("send to back" will push it too far back). Repeat the right click - "send backward" until you can see all of your text.
Ok, now it's time to make it pretty. Make sure you're still on the "Stickers" menu. Now you can scroll around and check out all of the fun images and icons they have for you to use. There are many options! Beware for the "premium only" icons, though, you can't get these for free. Keep scrolling down and there will be more free options!
Here is what I chose to do. Notice that I changed my background rectangle to pink, and added another white rectangle on top - but this time I used the option with the rounded corners rather than the square corners. I also added some squiggly leaf things - these are actually two stickers that I arranged to touch, making it look like one. You can easily flip, rotate, and otherwise edit the stickers from the properties window that shows up when you click the object. Remember, to change the layering of any object, right click on it, and click "send backward" or "bring forward". If you want to send it all the way to the back or front of your objects, click "send to back" or "bring to front".

Here is another option I played around with, just keeping the gray background.

Once you're satisfied, click the "save and share" tab. It should realize that you want to save it at 760x100 pixels, but just check to make sure. Then click "save photo"! That's it! Now it's ready to be added to your shop or blog.

I would LOVE to see your creations if you try this! Please leave links! And if you have questions or need clarification on anything, just ask below and I'll try to respond below as well.


 Charmed By Nature
 19 Moons Jewelry & Accessories
 Barker Bell Herbs & Heirlooms
